Short Answer
Good logo placement on ceramic dinnerware supports brand recognition without disturbing food presentation, grip, cleaning, stacking, or compliance. For most collections, use a clear backstamp for product identity and reserve visible logos for a small, intentional area such as an outer rim or mug side. Approve the exact size and position on fired samples, then record measurements from stable product reference points.
I have seen buyers spend weeks perfecting a logo and minutes choosing its position. On a real plate it may feel loud; on a bowl it may tilt; under a mug it may fight with the foot ring.
The solution is a short placement brief that connects branding with real use.
Copy-Ready Logo Placement Brief
Use this template when you send artwork to a ceramic supplier:
| Brief Field | What the Buyer Should Write | How I Judge a Strong Answer |
|---|---|---|
| Product and SKU | Shape code, fired size, body, glaze, and color | The mark is tied to one exact product version |
| Logo purpose | Brand identity, decoration, hotel control, traceability, or legal information | One main job is named, not simply “add our logo” |
| Preferred zone | Backstamp, outer rim, mug side, bowl exterior, handle, or packaging | The zone is shown on a drawing and fired sample |
| Visibility | Hidden, subtle, visible while serving, or hero design feature | Viewing distance and table orientation are clear |
| Artwork size | Fired width and height, plus minimum clear space | Size refers to the fired result, not only the digital file |
| Position control | Distance from foot ring, rim, centerline, handle joint, or another stable point | Measurements do not rely on “looks centered” |
| Decoration route | Decal, stamp, embossing, glaze mark, or other agreed process | Method matches the artwork detail and placement surface |
| Market and use | Destination market, food-contact area, dishwasher or microwave claim, hospitality or home use | Compliance and durability scope match the real product |
| Acceptance range | Position, angle, color, clarity, and allowed visual variation | Ideal, acceptable edge, and reject examples are included |
| Approval evidence | Fired samples, dated photos, signed drawing, and retained master | Bulk QC can compare against the same reference |
A supplier should return the brief with limits, process notes, and risk areas marked.
Fill the Brief by Watching the Product in Use
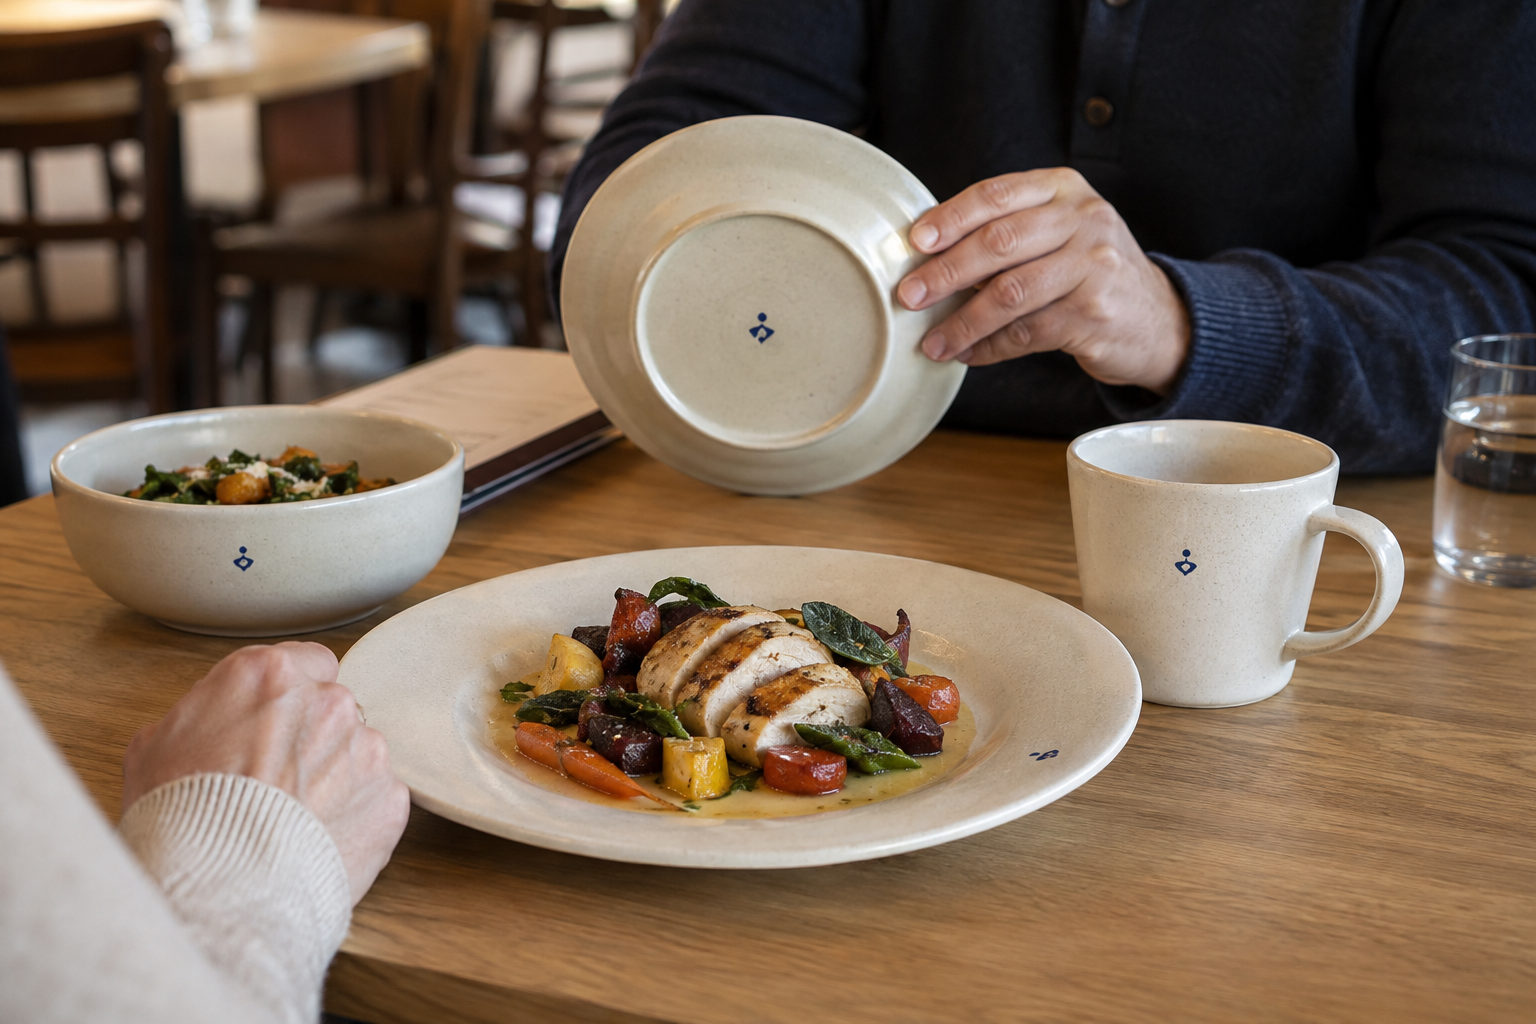
Review logo visibility with food, drink, hands, and normal table orientation.
Plate: Keep Food as the Main Subject
For branded ceramic plates, the center well is highly visible when empty but often covered during service. A large center logo can compete with the chef’s plating and may face more direct food-contact review. A small rim mark can remain visible, but curved or uneven rims make alignment harder.
Place food on the fired sample. View it from the diner’s seat, across the table, and through a phone camera. The logo should remain balanced when the plate rotates.
Bowl: Test the Curve and Fill Level
An inside bowl logo may look straight on flat artwork but distort on a curved wall. It can also disappear below soup or salad. An exterior mark is quieter, yet bowls may nest against it during storage.
Fill the bowl to its intended serving level and test a working stack. Check whether the mark sits on a stable decoration zone, rubs another piece, or looks tilted from normal eye level.
Mug: Design Around the Hand and Handle
A mug logo should be reviewed in both right- and left-hand use. A single side mark may face the drinker in one hand and face outward in the other. A mark too close to the handle joint can be hard to apply and visually crowded.
Hold the filled mug, photograph both grip directions, and mark a clear decoration zone. Keep fine artwork away from sharp curves unless fired trials prove it remains clean.
Backstamp: Give Information Room to Breathe
The ceramic backstamp placement is usually inside the foot ring or another protected base area. Confirm that the mark does not cross the ring, sit on an unstable curve, or become hidden by manufacturing marks. Small text must remain readable after firing.
If the base must carry a brand, country information, care symbol, product code, or importer detail, plan the hierarchy early. Do not squeeze every item into one tiny circle at the end.
Separate Brand Mood From Required Information
Visible branding and required information need not share a place. A rim emblem can carry brand mood while a backstamp or package carries details.
Keep proof that your business can use the artwork. The WIPO trademark information page is a useful general starting point, although trademark clearance is separate from ceramic production.
For foodware, decoration materials and placement should be reviewed for the destination market. The FDA guidance on lead in foodwares provides official U.S. context. The European Commission food contact materials overview explains the broader EU framework, and the ISO 6486 ceramicware standard overview introduces a recognized lead and cadmium release test reference. Confirm the exact scope with qualified compliance support.
Turn “A Little to the Left” Into a Measurable Position
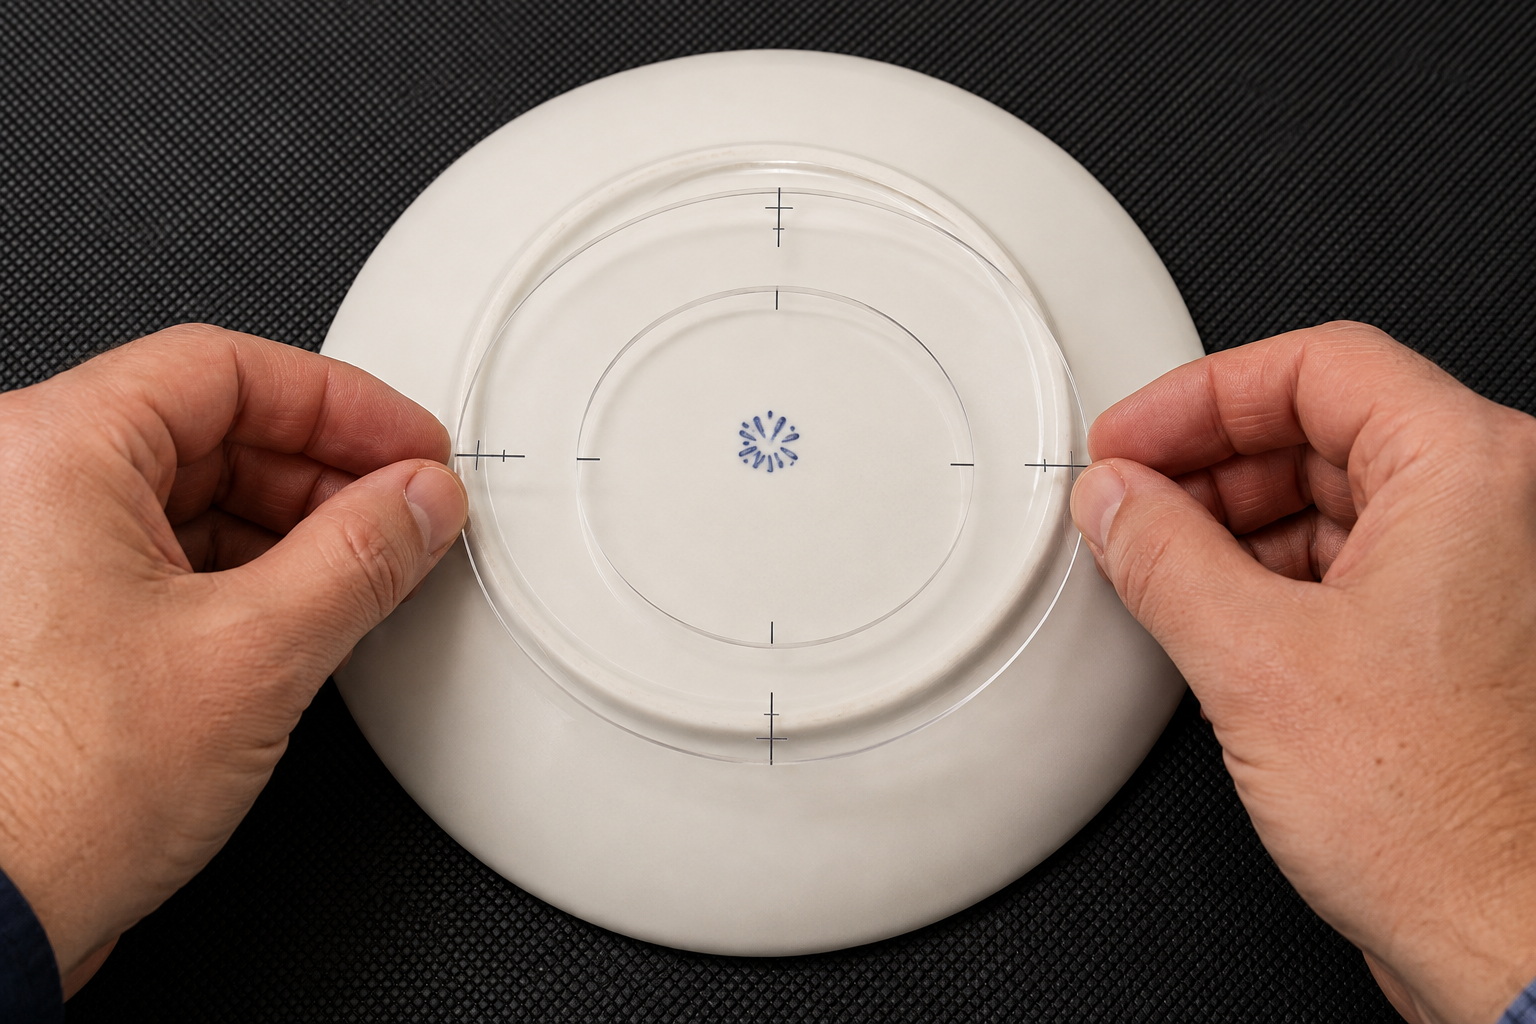
Stable reference points make ceramic logo placement repeatable in bulk production.
Do not measure a ceramic logo from a soft or irregular edge. Use reference points that production and QC can find again: product centerline, foot-ring edge, handle center, or a defined rim line.
On the approval drawing, record fired dimensions and tolerance. Add a front photo, profile photo, and a simple position overlay. For an organic shape, also define how the piece is oriented before measuring. Otherwise, two inspectors can both follow the drawing and still disagree.
I like a transparent placement template or checking fixture for repeated marks. The buyer does not need to prescribe factory equipment, but should ask how the supplier controls position and angle in bulk.
Compare a Weak Brief With a Strong Brief
Weak: “Put our logo under the plate, centered, same as the mockup.”
Stronger: “Apply artwork PL-04 as a fired backstamp, 28 mm wide after firing, centered inside the foot ring of shape P208. Keep the full mark clear of the ring. Match the signed fired sample and approved position overlay; report any process limit before bulk.”
The stronger version names the file, size, reference point, method, master sample, and escalation rule. Your final tolerance should come from fired trials and supplier capability, not from a number copied from another shape.
Run a Three-View Approval
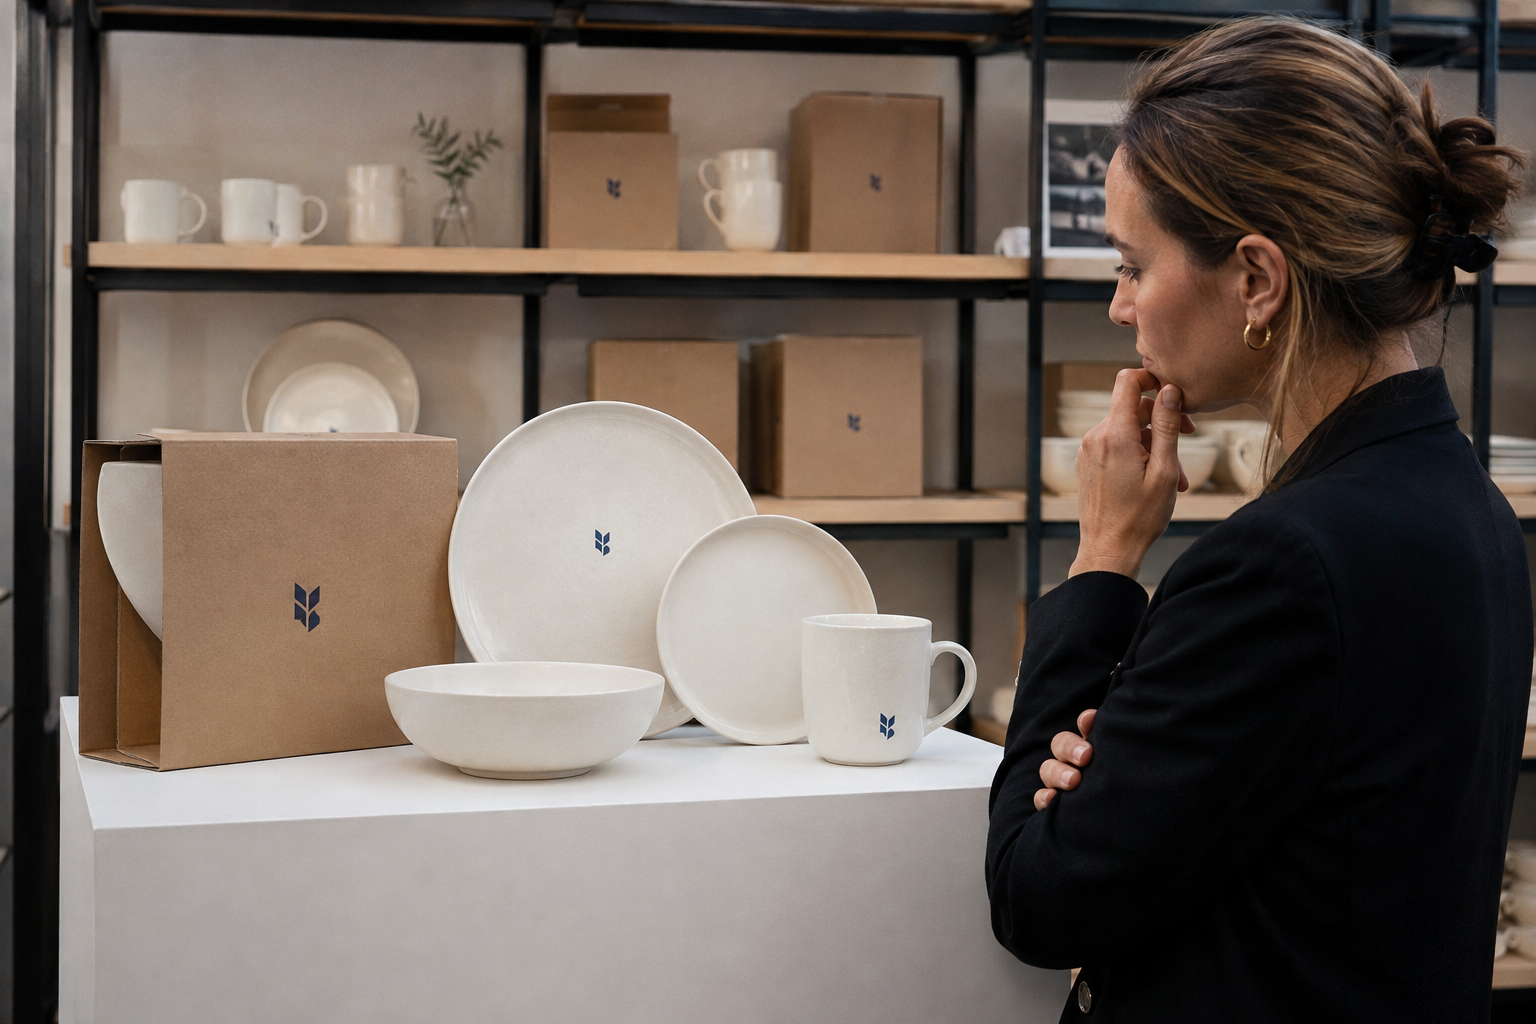
Check the whole collection so branding feels consistent without becoming too loud.
Before bulk production, review every logo in three views:
- Use view: Add food or drink, hold the item, and see what the customer sees.
- Range view: Place the plate, bowl, mug, and packaging together. Check whether branding repeats too loudly or disappears completely.
- Control view: Inspect position, angle, clarity, glaze interaction, foot-ring clearance, and the approved variation range.
I photograph all three. A close-up cannot prove that the whole collection feels balanced.
My Advice as a Manufacturer
My simple advice is to start quietly. A clear backstamp plus one carefully chosen visible mark is often enough. Let the ceramic shape, glaze, food, and brand work together.
I ask buyers to approve the position on the final body and glaze because firing shrinkage, curves, and glaze can change the result. Keep the signed placement brief, drawing, photos, and fired master together for repeat orders.
FENN can help turn logo artwork into a practical placement brief for private-label dinnerware. Share the range, artwork, target market, use channel, and preferred visibility, and we can review the strongest zones before sampling.
Questions Buyers Often Ask
Where is the safest place for a logo on a ceramic plate?
An underside backstamp is often the simplest starting point for identity. “Safest” still depends on materials, process, wording, and market, so confirm the compliance scope.
Should every piece in a dinnerware set carry the same visible logo?
Not always. Repeating a visible mark on every plate, bowl, and mug may feel heavy. Use the range view to decide which pieces carry visible branding and which use only a backstamp.
Can a logo sit across the foot ring?
I avoid it. The ring supports the piece, meets kiln or finishing processes, and contacts tables or stacks. Keep the mark inside or clearly away from it.
How do we center a logo on an irregular plate?
Define the product orientation and centerline first. Then measure from stable reference points and approve a fired position overlay rather than relying on visual centering.
Conclusion
Good logo placement on ceramic dinnerware starts with the mark’s job and ends with a measurable fired-sample standard. Use the placement brief, test each item in real use, review the whole range, and keep branding clear without letting it take over the table.