
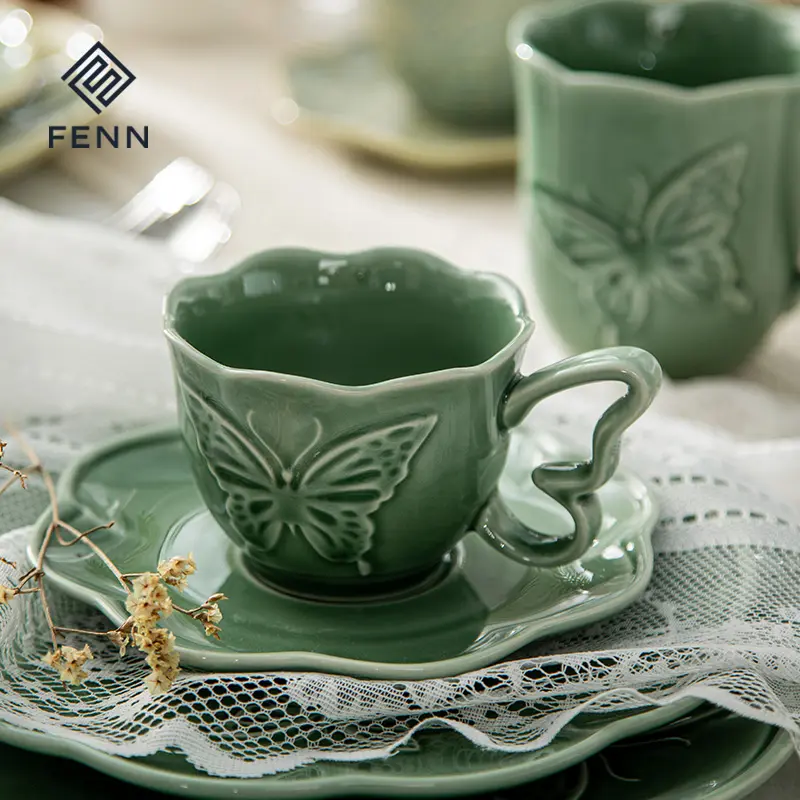
Deep embossing looks beautiful on ceramic tableware, but behind that beauty is a quiet battle with clay, pressure, hands, glaze, and fire.
To reproduce deep embossing in ceramic tableware, we need controlled mold depth, stable green body density, careful trimming and washing, predictable firing shrinkage, and strict texture alignment, often keeping key dimensional tolerance within $\pm 0.5\text{mm}$ for premium custom projects.
The secret is not only making a bold texture. The real secret is keeping it sharp after every production step.
Why Is Deep Embossing So Difficult on Ceramic Tableware?
Deep embossing is difficult because ceramic clay shrinks, moves, softens, and changes during forming, drying, finishing, glazing, and firing.
Deep embossed ceramic tableware needs precise control from mold design to kiln firing. A texture that is 2.5mm deep in the mold may become softer, smaller, or slightly shifted after trimming, washing, glazing, and firing shrinkage.
I like deep embossed tableware because it feels alive. You can run your finger across the surface and feel the story before food even touches the plate.
But in production, deep embossing is not romantic at all.
It is picky. Very picky.
A shallow line is easy to copy. A logo on a flat bottom is not too scary. But an irregular texture with a depth of 1.5mm, 2.5mm, or even 3.0mm? That is where the real work starts.
The first problem is clay movement. Ceramic is not metal. It does not stay exactly where we put it. During drying, water leaves the body. During firing, the body shrinks again. If one area is thicker than another, the shrinkage will not be equal. Then the texture may become blurred, warped, or slightly pulled to one side.
The second problem is pressure. If pressure is not balanced during forming, the high points and low points of the embossing will have different density. In simple words, one part of the plate may be more compact than another. Later, inside the kiln, those areas shrink differently. That is when the plate starts telling us, “You rushed me.”
The third problem is what happens after forming. Many people forget this part. Before glazing and firing, ceramic pieces still go through manual trimming, fettling, sponge washing, surface cleaning, and sometimes small shape correction. These steps sound small, but they can slowly soften a sharp embossed texture.
A beautiful relief pattern can be damaged before it even reaches the kiln.
Key Risk Points for Deep Embossing
| Process Stage | Main Risk | Control Target |
|---|---|---|
| Mold design | Texture too sharp or too narrow | Add proper draft angle and radius |
| Forming | Uneven pressure and density | Keep pressure stable across texture zones |
| Trimming | Raised details may be cut or flattened | Keep tools away from protected texture zones |
| Washing | Wet sponge may soften relief edges | Limit wiping passes and hand pressure |
| Drying | Warping and edge lift | Slow, balanced moisture release |
| Glazing | Texture filling or softening | Control glaze thickness |
| Firing | Shrinkage and misalignment | Match body, mold, and kiln curve |
For custom ceramic embossing depth, I usually suggest testing depth in stages. For example, if the target fired depth is 1.8mm, we may design the mold depth around 2.1mm to 2.4mm depending on clay body shrinkage, manual finishing loss, and glaze thickness. This is not a fixed number. It must be tested.
A practical tolerance target for premium embossed dinnerware is often around $\pm 0.5\text{mm}$ on visible texture depth and key alignment points. For very fine logo embossing, we may need tighter visual control, especially if the pattern sits near the rim or center line.
This is why a precision mold ceramic tableware project should never start with mass production. It should start with a test mold, sample firing, shrinkage mapping, finishing checks, and a “touch test.”
Yes, a touch test.
Because deep texture is not only something people see. It is something they feel.
For buyers looking for custom ceramic embossing depth, the best question is not “Can you make this texture?” The better question is: “Can you keep this texture clear after forming, trimming, washing, glazing, firing, and bulk production?”
That question separates a normal supplier from a real irregular texture ceramic manufacturer.
How Does Isostatic Pressing Control Irregular Deep Embossing Better?
Isostatic pressing helps control deep embossing by applying more even pressure to the ceramic body, reducing density differences and shape distortion.
For irregular and deep embossed ceramic tableware, isostatic pressing usually offers better deformation control than traditional roller forming because it creates a more uniform green body density across complex surface textures.
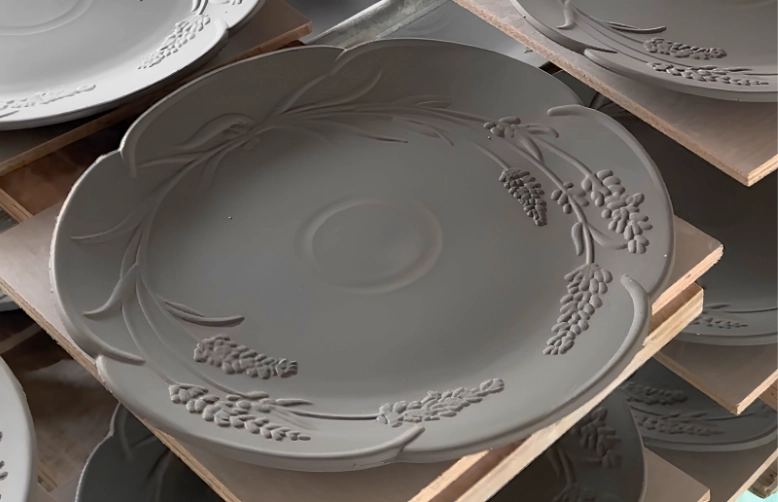
When I compare isostatic pressing with traditional roller forming, I like to use a simple image.
Roller forming is like pressing dough with a spinning tool.
Isostatic pressing is more like giving the whole shape an even hug.
That “even hug” matters.
In traditional roller forming, a soft ceramic body is placed into a mold, and a rotating metal head shapes it. This method is fast and useful for many round plates, bowls, and cups. It works well when the shape is regular and the texture is not too aggressive.
But when the surface has deep, irregular embossing, roller forming can run into problems. The clay may stretch over high points, compress unevenly in low points, or drag slightly along the texture direction. If the texture is asymmetric, the risk becomes higher.
Isostatic pressing uses spray-dried ceramic powder and pressure to form the piece. Because pressure is applied more evenly, it can reduce local density differences. This is helpful when we want sharper texture, cleaner edges, and better repeatability in complex shapes.
In some factories, people may call this “high-pressure forming.” But to be clear, in this article, high-pressure forming refers specifically to isostatic dry pressing, not high-pressure casting or pressure slip casting.
Isostatic Pressing vs Traditional Roller Forming
| Item | Isostatic Pressing | Traditional Roller Forming |
|---|---|---|
| Best for | Flatware, irregular shapes, complex relief | Round and regular shapes |
| Pressure behavior | More uniform pressure | Directional mechanical pressure |
| Texture control | Better for deep and uneven embossing | Better for shallow or regular texture |
| Deformation risk | Lower when mold and powder are stable | Higher on asymmetric deep texture |
| Tooling cost | Usually higher | Usually lower |
| Production feeling | More precise | More flexible for common shapes |
This does not mean roller forming is bad. Not at all.
For many classic ceramic plates and bowls, roller forming is efficient, stable, and cost-friendly. If the design has a simple rim line, a soft groove, or a light embossed logo, roller forming may be enough.
But if the design has:
- irregular stone-like texture,
- deep botanical relief,
- uneven handmade-looking surfaces,
- logo embossing near curved areas,
- non-round plates,
- or texture depth above 2.0mm,
then isostatic pressing becomes much more attractive.
For deep embossing, I usually look at three numbers before choosing the process:
| Parameter | Suggested Review Point |
|---|---|
| Embossing depth | Below 1.0mm, 1.0–2.0mm, or above 2.0mm |
| Texture width | Avoid too-narrow grooves that trap glaze |
| Wall thickness change | Keep thickness transition smooth, not sudden |
A common mistake is making the texture look amazing in 3D design but impossible in clay. The computer does not care about shrinkage. The kiln does. The worker’s sponge does too.
For precision mold ceramic tableware, the mold should include compensation for shrinkage, texture softening, manual finishing loss, and release angle. I usually prefer a draft angle of at least 3° to 5° on deeper relief walls, depending on the texture and clay body. Sharp 90° walls look strong in design files, but in production they can cause sticking, cracking, or weak texture release.
Here is the honest truth: deep embossing is a conversation between design and physics.
A good manufacturer does not just say yes. A good manufacturer says, “Yes, but this part needs a radius. This groove may hold too much glaze. This edge may deform. This area must not be wiped too heavily after forming. Let’s adjust it before the mold is made.”
That is how beautiful ceramic stays beautiful in production.
For buyers searching precision mold ceramic tableware, isostatic pressing is often the smarter route when the pattern is deep, asymmetric, or highly detailed.
How Can We Prevent Texture Blurring During Finishing, Glazing, and Firing?
Texture blurring happens when manual finishing softens the relief, glaze fills fine details, firing shrinkage is uneven, or the original embossing is not deep and clean enough.
To prevent ceramic texture blurring, control trimming pressure, sponge washing passes, glaze thickness, relief edge radius, groove width, green body moisture, and firing shrinkage before mass production.
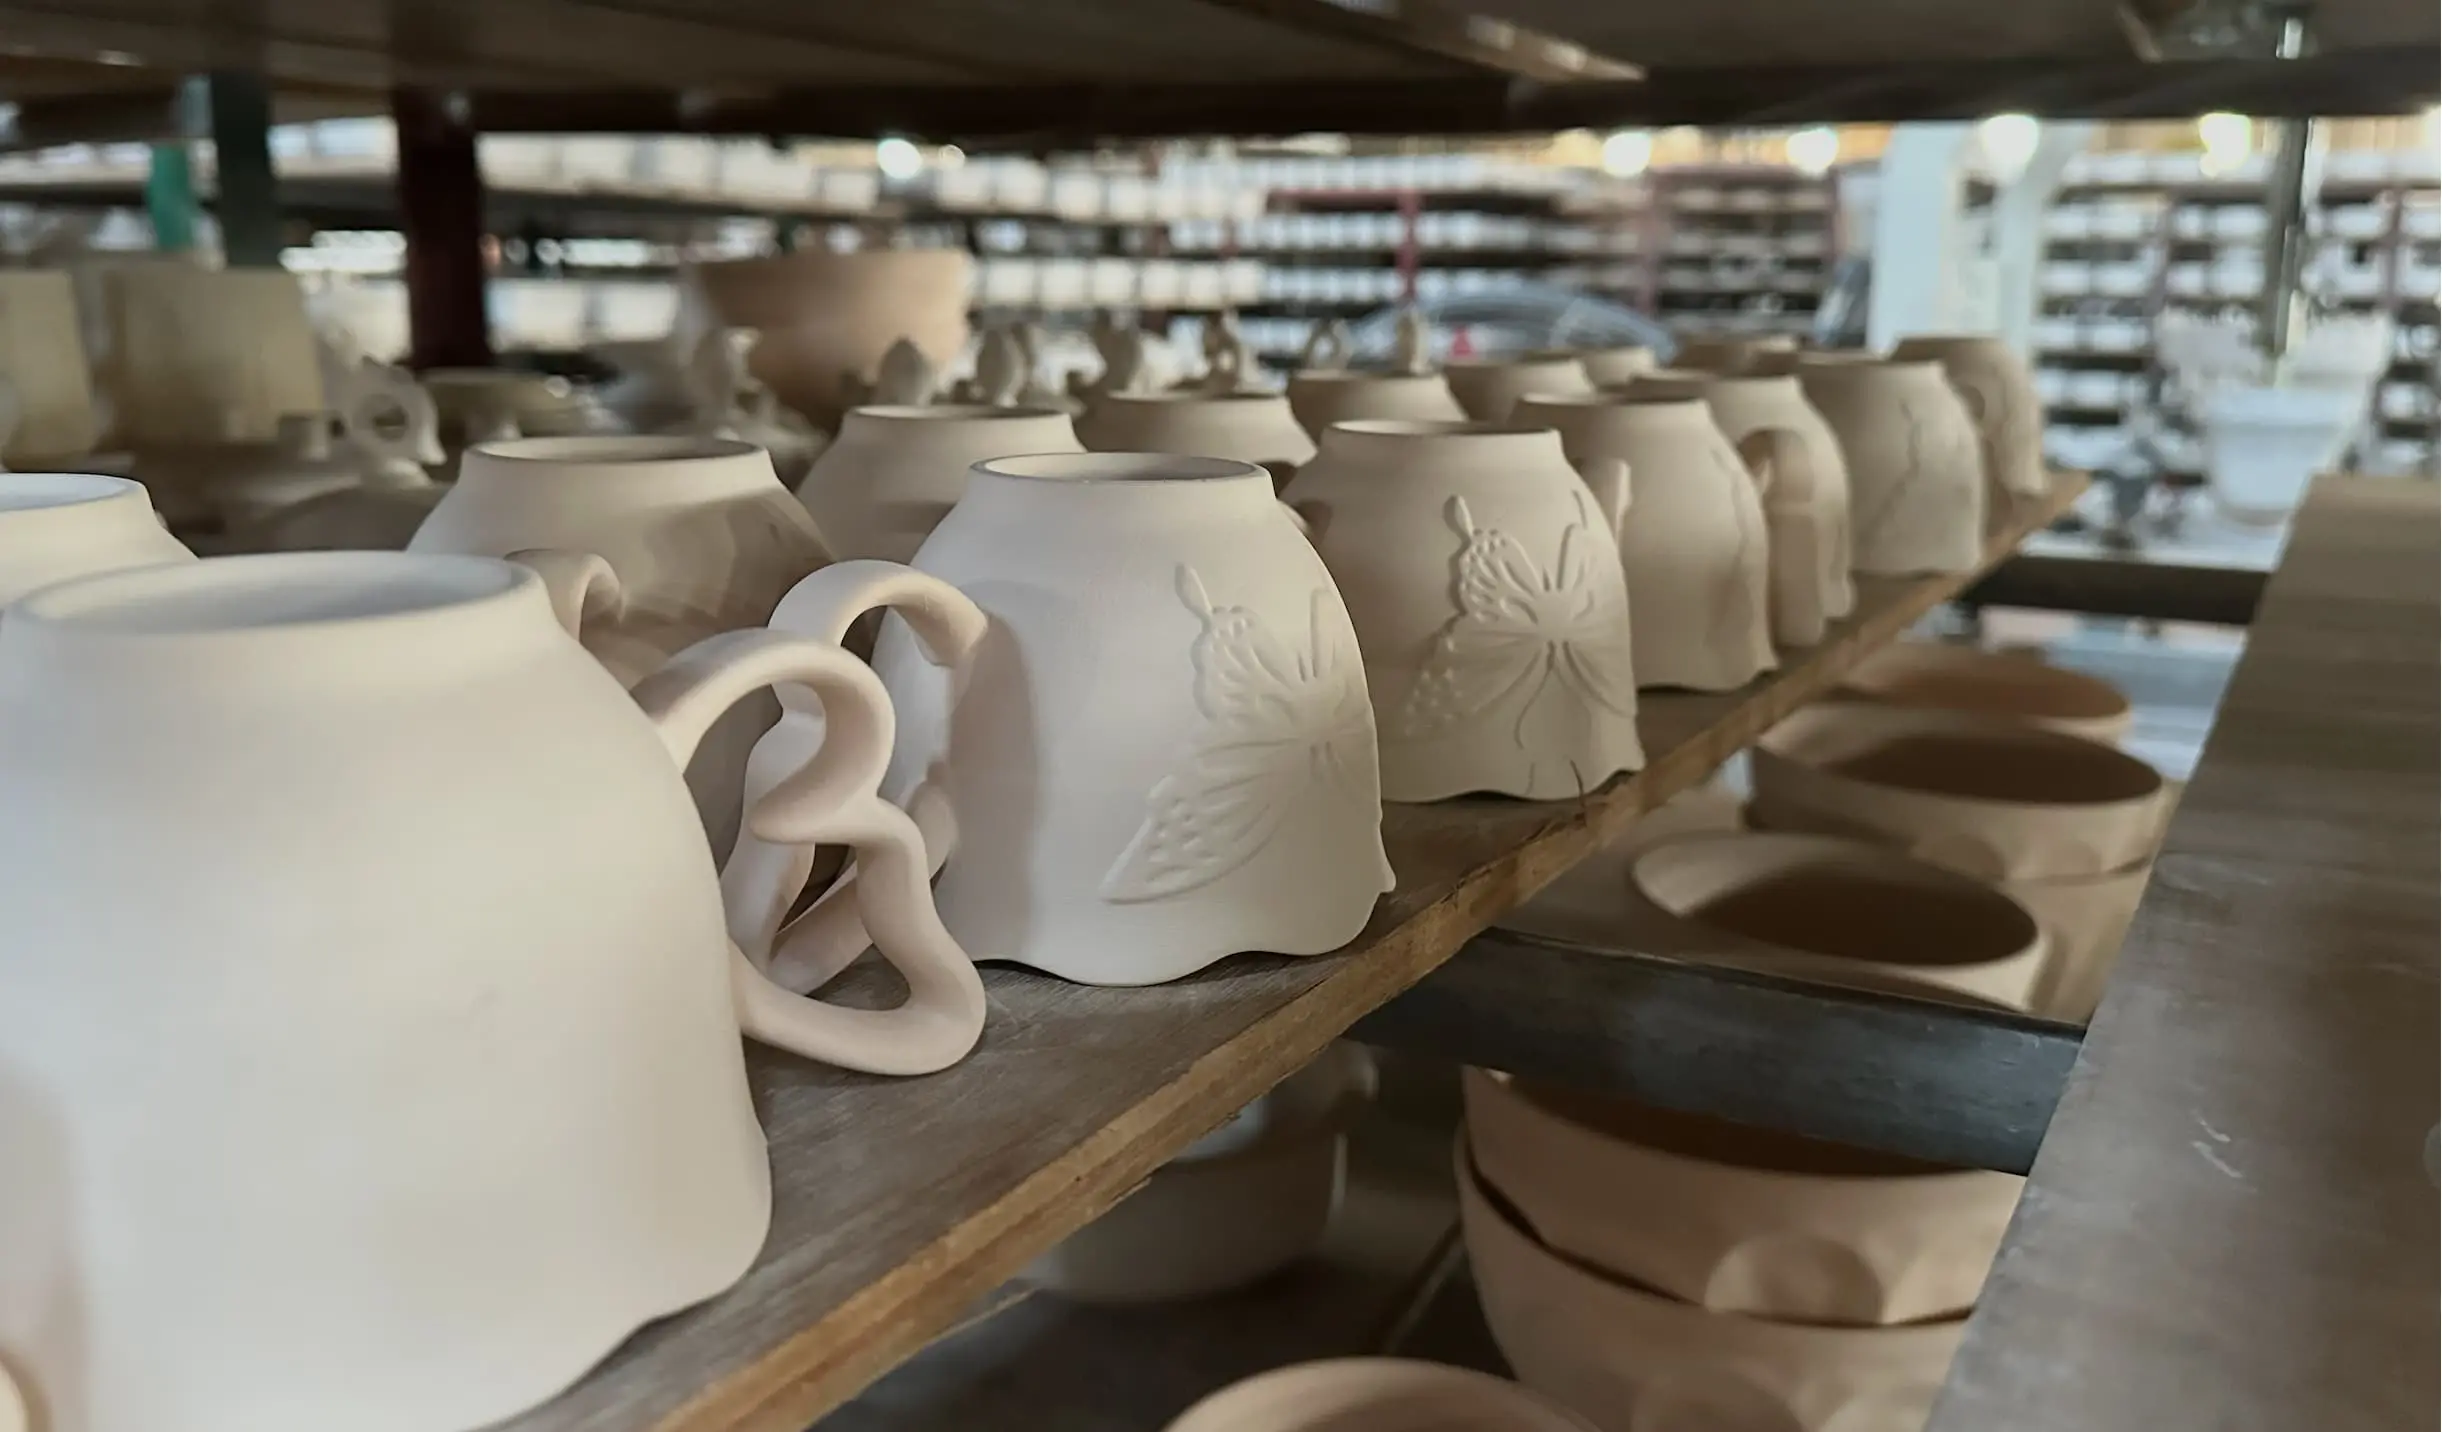
A deep embossed plate can look perfect right after forming. Then it goes through trimming, washing, glazing, and firing.
By the time it comes out of the kiln, the details may look like someone gently erased them.
That hurts.
I have seen samples where the mold was good and the forming was stable, but the final texture still looked weak. Sometimes the glaze caused it. Sometimes the firing curve caused it. And sometimes, very quietly, the damage happened during manual finishing.
Manual Finishing Can Also Blur Deep Embossing
One detail many buyers overlook is what happens after forming.
Even if the mold is accurate and the forming process is stable, the texture can still lose sharpness during manual trimming, sponge washing, fettling, and surface cleaning. This is especially common when workers try to remove burrs, smooth the rim, or clean clay dust from recessed texture areas.
Deep embossing is not only damaged by the kiln. Sometimes, it is softened by a wet sponge before it even reaches the glaze line.
For embossed ceramic tableware, manual finishing must follow a clear protection rule: clean the product, but do not “polish away” the design.
In practice, I suggest controlling these points:
| Manual Process | Risk to Embossing | Control Method |
|---|---|---|
| Trimming | Tool may cut or flatten raised texture | Keep trimming tools away from texture zones; use fixed trimming guides |
| Sponge washing | Repeated wiping can soften relief edges | Limit wiping passes, especially on raised details |
| Fettling | Hand pressure may deform soft clay | Work at leather-hard stage, not when the body is too wet |
| Dust cleaning | Clay dust may stay inside deep grooves | Use soft brush or air cleaning before wet sponge |
| Rim correction | Shape correction may shift pattern alignment | Use datum points and avoid twisting pressure |
For high-detail deep embossing, I usually recommend defining a “protected texture zone” in the production SOP. Workers should not repeatedly wipe this area with a wet sponge. If cleaning is needed, use light, single-direction wiping, soft brushing, or low-pressure air cleaning first.
A practical control target is to keep visible texture loss after manual finishing below 0.2–0.3mm where possible, and keep key alignment points within about $\pm 0.5\text{mm}$. For premium embossed tableware, the factory should compare pieces after trimming and washing against a master green-body sample before glazing.
This step sounds small, but it can decide whether the final product feels crisp and premium, or soft and unclear.
In other words, deep embossing is not protected only by good molds. It is protected by disciplined hands.
Glaze Can Also Soften the Texture
Glaze is another quiet troublemaker.
Glaze is glassy after firing. It flows. It softens edges. It fills small grooves. A 0.4mm fine line can disappear under heavy glaze. A 1.5mm texture can become visually closer to 1.0mm. A sharp raised edge can turn into a soft hill.
Sometimes that softness is beautiful. Sometimes it kills the design.
So we need to decide early: do we want a soft handmade look, or a crisp sculpted look?
Texture Blurring Control Checklist
| Control Area | Practical Guideline |
|---|---|
| Manual trimming | Avoid cutting into raised or recessed texture areas |
| Sponge washing | Limit wiping pressure and wiping times |
| Mold depth | Add shrinkage, finishing, and glaze compensation |
| Relief edge | Use small radius instead of knife-sharp edge |
| Groove width | Avoid narrow grooves under 0.8mm when glaze is thick |
| Glaze thickness | Test thinner glaze on detailed texture |
| Firing curve | Avoid over-firing that softens the body too much |
| Inspection | Compare fired sample with master texture board |
For deep embossing, I like to build what I call a “texture ladder.” It is a test piece with several embossing depths, such as:
- 0.8mm
- 1.2mm
- 1.6mm
- 2.0mm
- 2.5mm
- 3.0mm
Then we apply the planned finishing method, planned glaze, and planned kiln curve. After firing, we measure the remaining visible depth and check the hand feel.
This small test can save weeks.
For example, if the 1.2mm texture becomes too soft after washing and firing, we know the real production design should move closer to 1.8mm or 2.0mm. If the 3.0mm texture causes cracking or glaze pooling, we know it is too aggressive.
This is much better than guessing.
A Practical Texture Test Matrix
| Test Item | What We Measure | Why It Matters |
|---|---|---|
| Depth after forming | Original green body texture depth | Confirms mold and forming result |
| Depth after finishing | Loss caused by trimming or washing | Checks manual process damage |
| Fired depth | Difference before and after firing | Checks final texture loss |
| Glaze pooling | Glaze build-up in grooves | Prevents blurred detail |
| Edge clarity | Visual sharpness of raised lines | Protects design identity |
| Warpage | Plate flatness and rim height | Protects usability |
| Touch feel | Hand feel of texture | Checks real customer experience |
Another detail is glaze choice. Matte glaze, glossy glaze, reactive glaze, and transparent glaze behave differently. A reactive glaze may look rich and artistic, but it can also flow more visibly into low areas. A matte glaze may keep texture calmer, but it can show rubbing marks depending on formula and use case.
This is why I do not like approving deep embossed ceramic only from a 3D render. A render is clean. Real ceramic is alive. It shrinks, melts, breathes, and sometimes argues back.
For bulk production, I suggest setting a golden sample and a control range. For example:
- visible embossing depth: target 1.8mm, acceptable 1.5–2.1mm;
- manual finishing texture loss: preferably below 0.2–0.3mm;
- rim flatness: controlled within project-specific tolerance;
- logo position shift: within $\pm 0.5\text{mm}$ where visually critical;
- glaze accumulation: no blocked grooves or heavy pooling on key texture zones.
These numbers should be adjusted by product size, clay body, glaze, finishing method, and firing temperature. But the idea stays the same: make the quality visible, measurable, and repeatable.
For buyers looking for irregular texture ceramic manufacturer], this is the question I would ask: “Can you show me texture checks after forming, after washing, and after firing?”
The kiln is the final judge. But the worker’s hand can change the verdict before the kiln even starts.
How Do We Avoid Misalignment in Embossed Ceramic Patterns?
Misalignment happens when the mold, clay body, trimming, washing, decal, glaze, or kiln position does not follow the same reference points.
To avoid misalignment in embossed ceramic tableware, use fixed mold datum points, shrinkage-compensated artwork, controlled trimming position, gentle washing direction, stable drying support, and inspection marks that keep pattern shift within about $\pm 0.5\text{mm}$ for visible areas.
Misalignment is sneaky.
A pattern may be only 1mm off, but your eye catches it right away. The flower is not centered. The logo sits too close to the rim. The embossed line does not match the decal. The texture starts to feel cheap, even if the material is good.
That is why alignment must be designed into the process, not checked only at the end.
The first step is datum control. A datum is a fixed reference point. In plain English, it is the “home address” of the design. Every mold, trimming tool, washing direction, decal position, and inspection step should know where that home address is.
For a round plate, the center point and foot ring are often key references. For an oval plate, we may use the long axis and short axis. For an irregular plate, we may need custom positioning marks hidden in the mold or controlled by the foot shape.
Misalignment Control Points
| Stage | What Can Go Wrong | How to Control It |
|---|---|---|
| Mold making | Texture not centered | Use CNC reference points and master drawing |
| Forming | Clay shifts in mold | Control feeding position and pressure |
| Trimming | Foot ring not aligned | Use fixed fixture and rotation check |
| Washing | Hand pressure twists or softens pattern | Use gentle single-direction cleaning |
| Decal or logo | Artwork shifts | Use alignment marks and operator guide |
| Drying | Plate warps or twists | Use balanced support and slow drying |
| Firing | Piece moves or deforms | Use stable kiln setting and setter control |
When embossing and decal decoration are both used, alignment becomes even more important. A raised logo with a printed color layer must match like a lock and key. If the decal shifts by 0.8mm, the customer may see it. If the pattern repeats around a rim, even a small angle error can build up around the full circle.
For these projects, I like to create an alignment map.
It sounds fancy, but it is simple. We mark the key design points and define allowed movement:
| Position | Target | Acceptable Range |
|---|---|---|
| Center logo | 0mm shift | $\pm 0.5\text{mm}$ |
| Rim texture start point | Same as mold datum | $\pm 0.7\text{mm}$ |
| Decal over embossing | Visual match | $\pm 0.5\text{mm}$ |
| Foot ring center | Match plate center | Project-specific tolerance |
| Protected texture zone | No visible hand damage | Compare with master green-body sample |
The harder the texture, the more useful this map becomes.
Another trick is to avoid placing super strict design elements in high-risk areas. For example, a deep embossed logo on a steep curved wall is harder to control than one on a flatter area. A repeating border near the rim needs more angle control than a free organic texture.
This does not mean we should make boring products. No. It means we should design with production in mind.
I always feel that good ceramic design is a little like good cooking. You can be creative, but you must respect the ingredient. Clay has memory. Fire has mood. Glaze has movement. And the hand that trims and washes the piece can either protect the design or quietly weaken it.
If we ignore these details, the product punishes us.
For custom ceramic embossing depth projects, misalignment control should start before the first mold is cut. The design drawing should include texture depth, draft angle, datum points, shrinkage rate, finishing protection zones, logo position, and inspection standard.
For buyers, this is a strong way to judge a supplier. Ask them how they control misalignment. If the answer is only “our workers are experienced,” be careful. Experience matters, but complex ceramic texture needs a system.
Experience plus system. That is the real safety net.
What Should Buyers Ask Before Starting a Deep Embossed Ceramic Project?
Buyers should ask about process choice, mold tolerance, manual finishing control, shrinkage testing, glaze behavior, alignment control, and bulk inspection standards.
Before starting a deep embossed ceramic tableware project, buyers should confirm the forming method, target embossing depth, mold tolerance, trimming and washing SOP, shrinkage compensation, glaze test plan, firing control, and acceptable misalignment range.
When a buyer sends me a beautiful texture design, I always feel excited first.
Then I become very practical.
Because the design is only the beginning. The real question is whether it can survive production without losing its soul.
For deep embossing and complex texture, buyers should not only ask for price. Price matters, of course. But a cheap mold that cannot hold texture is not cheap. A fast sample that cannot repeat in bulk is not fast. A beautiful first piece that cannot pass inspection is not success.
So I suggest asking these questions early:
Buyer Questions for Deep Embossed Ceramic Tableware
| Question | Why It Matters |
|---|---|
| What forming process do you suggest? | Helps compare isostatic pressing and roller forming |
| What is the target custom ceramic embossing depth? | Defines visual and touch result |
| What tolerance can you control? | Makes quality measurable |
| How do you compensate for shrinkage? | Prevents wrong final size |
| How do you protect texture during trimming? | Prevents tool damage on raised details |
| How do you control sponge washing? | Prevents relief edges from becoming soft |
| Will you test glaze on texture ladder samples? | Prevents texture blurring |
| How do you control misalignment? | Protects logos and pattern position |
| What is the inspection standard? | Reduces bulk production disputes |
For high-detail projects, I usually recommend a sample development path like this:
- Review 3D design and mark risky texture zones.
- Confirm target fired depth and acceptable tolerance.
- Adjust draft angle, radius, and groove width.
- Create test mold or texture ladder.
- Define protected texture zones for trimming and washing.
- Fire samples with selected clay body and glaze.
- Measure shrinkage, depth loss, finishing loss, flatness, and alignment.
- Approve golden sample.
- Start pilot run before full bulk production.
This may sound slower at first, but it is much safer.
The expensive mistakes in ceramic usually happen when people skip the boring checks. I have learned this the hard way. A tiny groove that looks harmless on screen can trap glaze. A sharp relief wall can stick in the mold. A beautiful organic rim can twist during firing. A worker trying to clean the surface can accidentally soften the texture. A decal can look perfect on a flat plate and wrong on an embossed one.
Ceramic teaches patience. Sometimes kindly. Sometimes not.
For brands, retailers, and HoReCa projects, deep embossed ceramic tableware can create a strong product identity. It feels custom. It feels crafted. It gives customers a reason to touch the product, not just look at it.
But to reach that result, the supplier must understand both design and production control.
That is why I believe the best irregular texture ceramic manufacturer should be able to talk about beauty and numbers in the same breath. Color, feeling, story, yes. But also $\pm 0.5\text{mm}$ tolerance, 0.2–0.3mm finishing loss control, shrinkage rate, mold draft, glaze thickness, kiln curve, protected texture zones, and inspection points.
That mix is where good tableware becomes repeatable tableware.
For anyone sourcing precision mold ceramic tableware, my advice is simple: do not approve the idea only. Approve the fired result. And before that, approve what happens between forming and firing too.
The mold is a promise. The hands protect it. The kiln tells the truth.
Conclusion
Deep embossing succeeds when design, mold, pressure, hands, glaze, firing, and inspection work together—not almost, but precisely.