Short Answer
The best ceramic dinnerware logo method depends on where the mark sits, how visible it should be, order volume, mold budget, decoration durability, and the rules of the sales market. Decals give the most detail and color flexibility. Clay impressions give a tactile mark; printed stamps give a colored one. Embossing builds the logo into the shape. A glaze mark gives a softer ceramic look. Approve the final method on fired samples, not on artwork alone.
When a buyer asks me to add a logo, I first ask what job it must do. A retail plate may need a discreet backstamp, while a gift collection may use a visible emblem.
Start With the Job of the Mark
Before comparing techniques, decide whether the mark must reproduce fine detail, feel handmade, become part of the shape, stay discreet, or change easily later. I choose the method after I know its placement and purpose. A supplier should ask those questions first.
Quick definition: A ceramic dinnerware logo can be added as a fired decoration, pressed or stamped into the clay, formed in the mold, or applied as a controlled glaze mark. Each route changes the cost, appearance, tolerance, and approval work.
Ceramic Dinnerware Logo Decision Map
Use this route map to narrow the first sample round.
| Your Main Need | Best Method to Sample First | Why It Fits | Main Buyer Risk |
|---|---|---|---|
| Fine artwork or multiple colors | Fired decal | Reproduces controlled artwork and can sit in a defined position | Color shift, edge visibility, firing change, or unsuitable placement |
| Small one-color maker mark | Stamp | A clay impression gives tactile detail; a printed stamp gives a simple colored mark | Uneven pressure, weak readability, or distorted edges |
| Permanent symbol in the shape | Embossing or debossing | The identity is built into the piece and does not depend on a printed layer | Tooling cost, glaze pooling, cleaning, and loss of detail after firing |
| Soft brush-like or ceramic effect | Glaze mark | Feels integrated with the glaze and can support an artisanal look | Natural variation may be wider than a printed logo |
| Flexible back-of-piece branding | Fired backstamp decal | Artwork can change without revising the main product mold | Foot-ring space, abrasion, firing color, and legibility |
| Very low starting quantity | Existing mold plus simple decal | Avoids new logo tooling while testing market demand | Unit decoration cost and minimum decal-print quantity |
This is a starting route. A professional proposal should state position, firing route, color limit, artwork size, tolerance, and sample method.
A FENN Relief Example: Start With the Finished Look
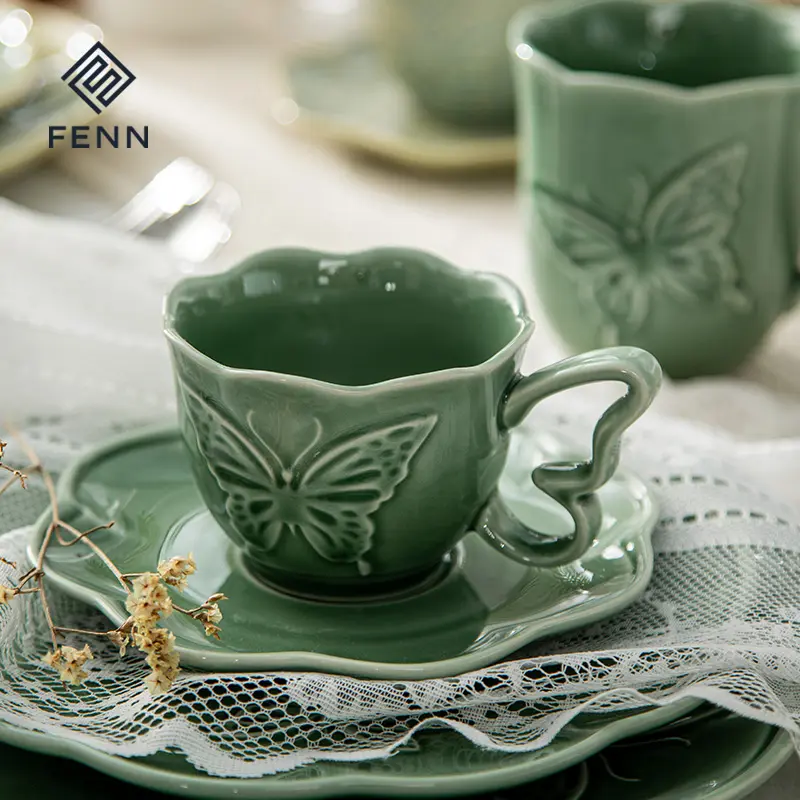
Look at the green cup and saucer in FENN’s Butterfly Whisper product photograph. The butterfly motif is visible as relief, with light catching its edges and darker green in parts of the design. This is a useful reference when a buyer wants an identity that can be felt as well as seen.
It is a decorative motif, not a customer logo sample. I would not use this photo to promise that tiny lettering will reproduce equally well. Instead, I would ask the buyer to compare the broad butterfly lines with their own artwork. If the logo has narrow gaps or small letters, simplify it or trial a printed route alongside the relief sample.
A photograph can show the effect. It cannot establish the relief depth, approved tolerance, or wash performance. Those belong in the sample record.
Route 1: Use a Fired Decal for Detail and Flexibility
A decal suits clean artwork, repeatable size, or several colors. It normally avoids a mold change. Ask whether it is on-glaze, in-glaze, or under-glaze because the route affects appearance, wear, and testing.
Do not approve a decal from a digital file. On fired samples, check line clarity, color under normal lighting, position, carrier edge, surface feel, expected wash use, and whether placement changes food-contact or care requirements.
For market review, the FDA guidance on lead in foodwares is a useful U.S. starting point. The artwork, pigments, product form, and destination market must match the actual compliance file; a general “food safe” statement is not enough.
Route 2: Choose a Stamp for Controlled Handmade Character
First, clarify what the supplier means by “stamp.” A clay stamp presses a mark into soft clay; a printed backstamp transfers ceramic color onto a surface. These are different processes, with different tools and firing requirements. A backstamp describes the location and purpose of a mark, not one specific decoration method. It can give private label dinnerware branding a workshop feeling without looking heavily advertised.
Approve an ideal mark, the lightest and deepest acceptable marks, and reject examples. Pressure, moisture, curves, and handling change the result.
Fine type is often a poor clay impression. Drying, glaze, and firing shrinkage can close gaps and soften details. Ask for practical line widths based on fired trials.
Route 3: Build the Logo Into the Mold With Embossing
Embossing raises the logo; debossing presses it below the surface. Both create permanent detail without printed color and suit a long-running shape.
The tradeoff is tooling. Ask who owns and stores it, whether its insert can be replaced, and what happens if artwork changes.
Glaze can soften a raised edge or pool inside a recess. Deep marks in a working area may trap soil or water. Review the fired result close up, at table distance, and through the product camera.
What FENN’s Unglazed Plate Reference Helps You Check
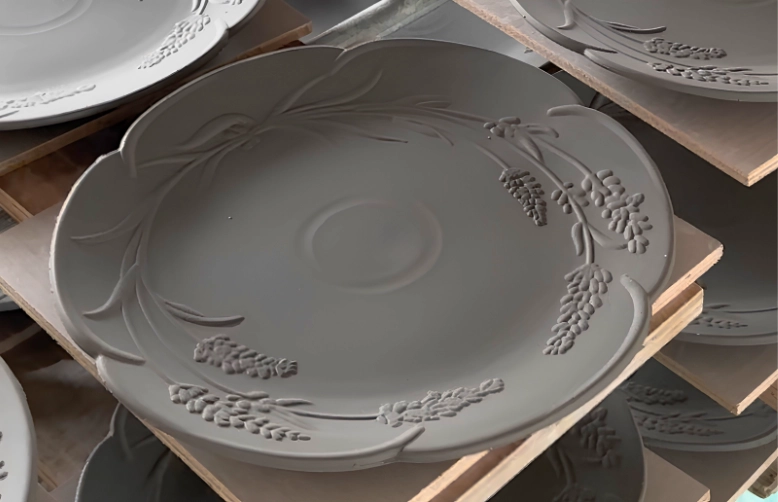
FENN’s deep embossing process guide includes an unglazed plate with raised botanical detail. The photograph makes the edges and gaps easy to see before a glaze covers them. For custom logo ceramic plates, I would use the same two-stage review: check the formed detail, then compare it with the fired, glazed result.
Ask the supplier to identify the thinnest line and smallest gap on your actual logo trial. A clean unglazed impression is only an intermediate checkpoint. The final decision depends on whether those features remain readable after glazing and firing.
Route 4: Use a Glaze Mark for a Softer Ceramic Look
“Glaze mark” is not a precise process specification. Ask whether the supplier means colored glaze, a stain under a clear glaze, a stencil, or a brush-applied mark, and where it sits in the firing sequence. A glaze mark can look softer than a crisp decal. Define “natural” with an approved shade range, edge character, coverage, and position tolerance. A pale mark may disappear on a reactive glaze, while a dark mark may bleed. Keep tiny legal text in a suitable backstamp or packaging system.
Compare Total Cost, Not Only the Logo Price
Review setup, rejects, labor, and future changes—not only unit logo price.
| Cost or Risk | Decal | Stamp | Emboss / Deboss | Glaze Mark |
|---|---|---|---|---|
| Artwork setup | Usually needed for screens, colors, or decal printing | Simple tool or applicator | Mold or insert engineering | Screen, stencil, or application setup may be needed |
| Mold change | Usually no | Sometimes no, depending on process | Usually yes | Usually no |
| Labor sensitivity | Placement and transfer handling | Pressure and alignment | Lower after stable tooling, but forming quality matters | Application thickness and position |
| Future artwork change | Relatively flexible | Tool may need replacement | Tooling change may be required | Screen or application setup may change |
| Visual tolerance | Can be tightly defined | Moderate natural variation | Shape and glaze variation | Often the widest natural variation |
| Best proof | Fired decorated sample and durability plan | Fired approval range | Fired glazed tool sample | Fired shade and edge range |
Ask how logo minimums interact with product MOQ. A special decal print run may be larger; control any branded excess.
Approve Placement With the Method
Method and placement are one decision. A center mark may need different review from a backstamp; a rim is harder to align; a base mark must clear the foot ring.
The European Commission food contact materials overview explains the EU framework. The ISO 6486 ceramicware standard overview is a starting reference for lead and cadmium release testing. Confirm the scope for the exact product, decoration, and market.
Keep proof that you can use the artwork. The WIPO trademark information page is a general starting point; trademark clearance remains separate from production approval.
My Fired-Sample Approval Card
I like one signed card that records:
1. Product code, ceramic body, glaze, and fired sample date.
2. Final vector artwork, physical logo size, and color reference.
3. Decoration method and firing route.
4. Position measurements from stable product reference points.
5. Front, side, and underside photos.
6. Acceptable color, depth, edge, and placement ranges.
7. Use checks and food-contact scope that match the market and claims.
8. A retained approved sample for bulk and repeat-order comparison.
If “make the logo like this” cannot become measurable approval points, the project is not ready for bulk.
Use a Row of Pieces to Check Variation
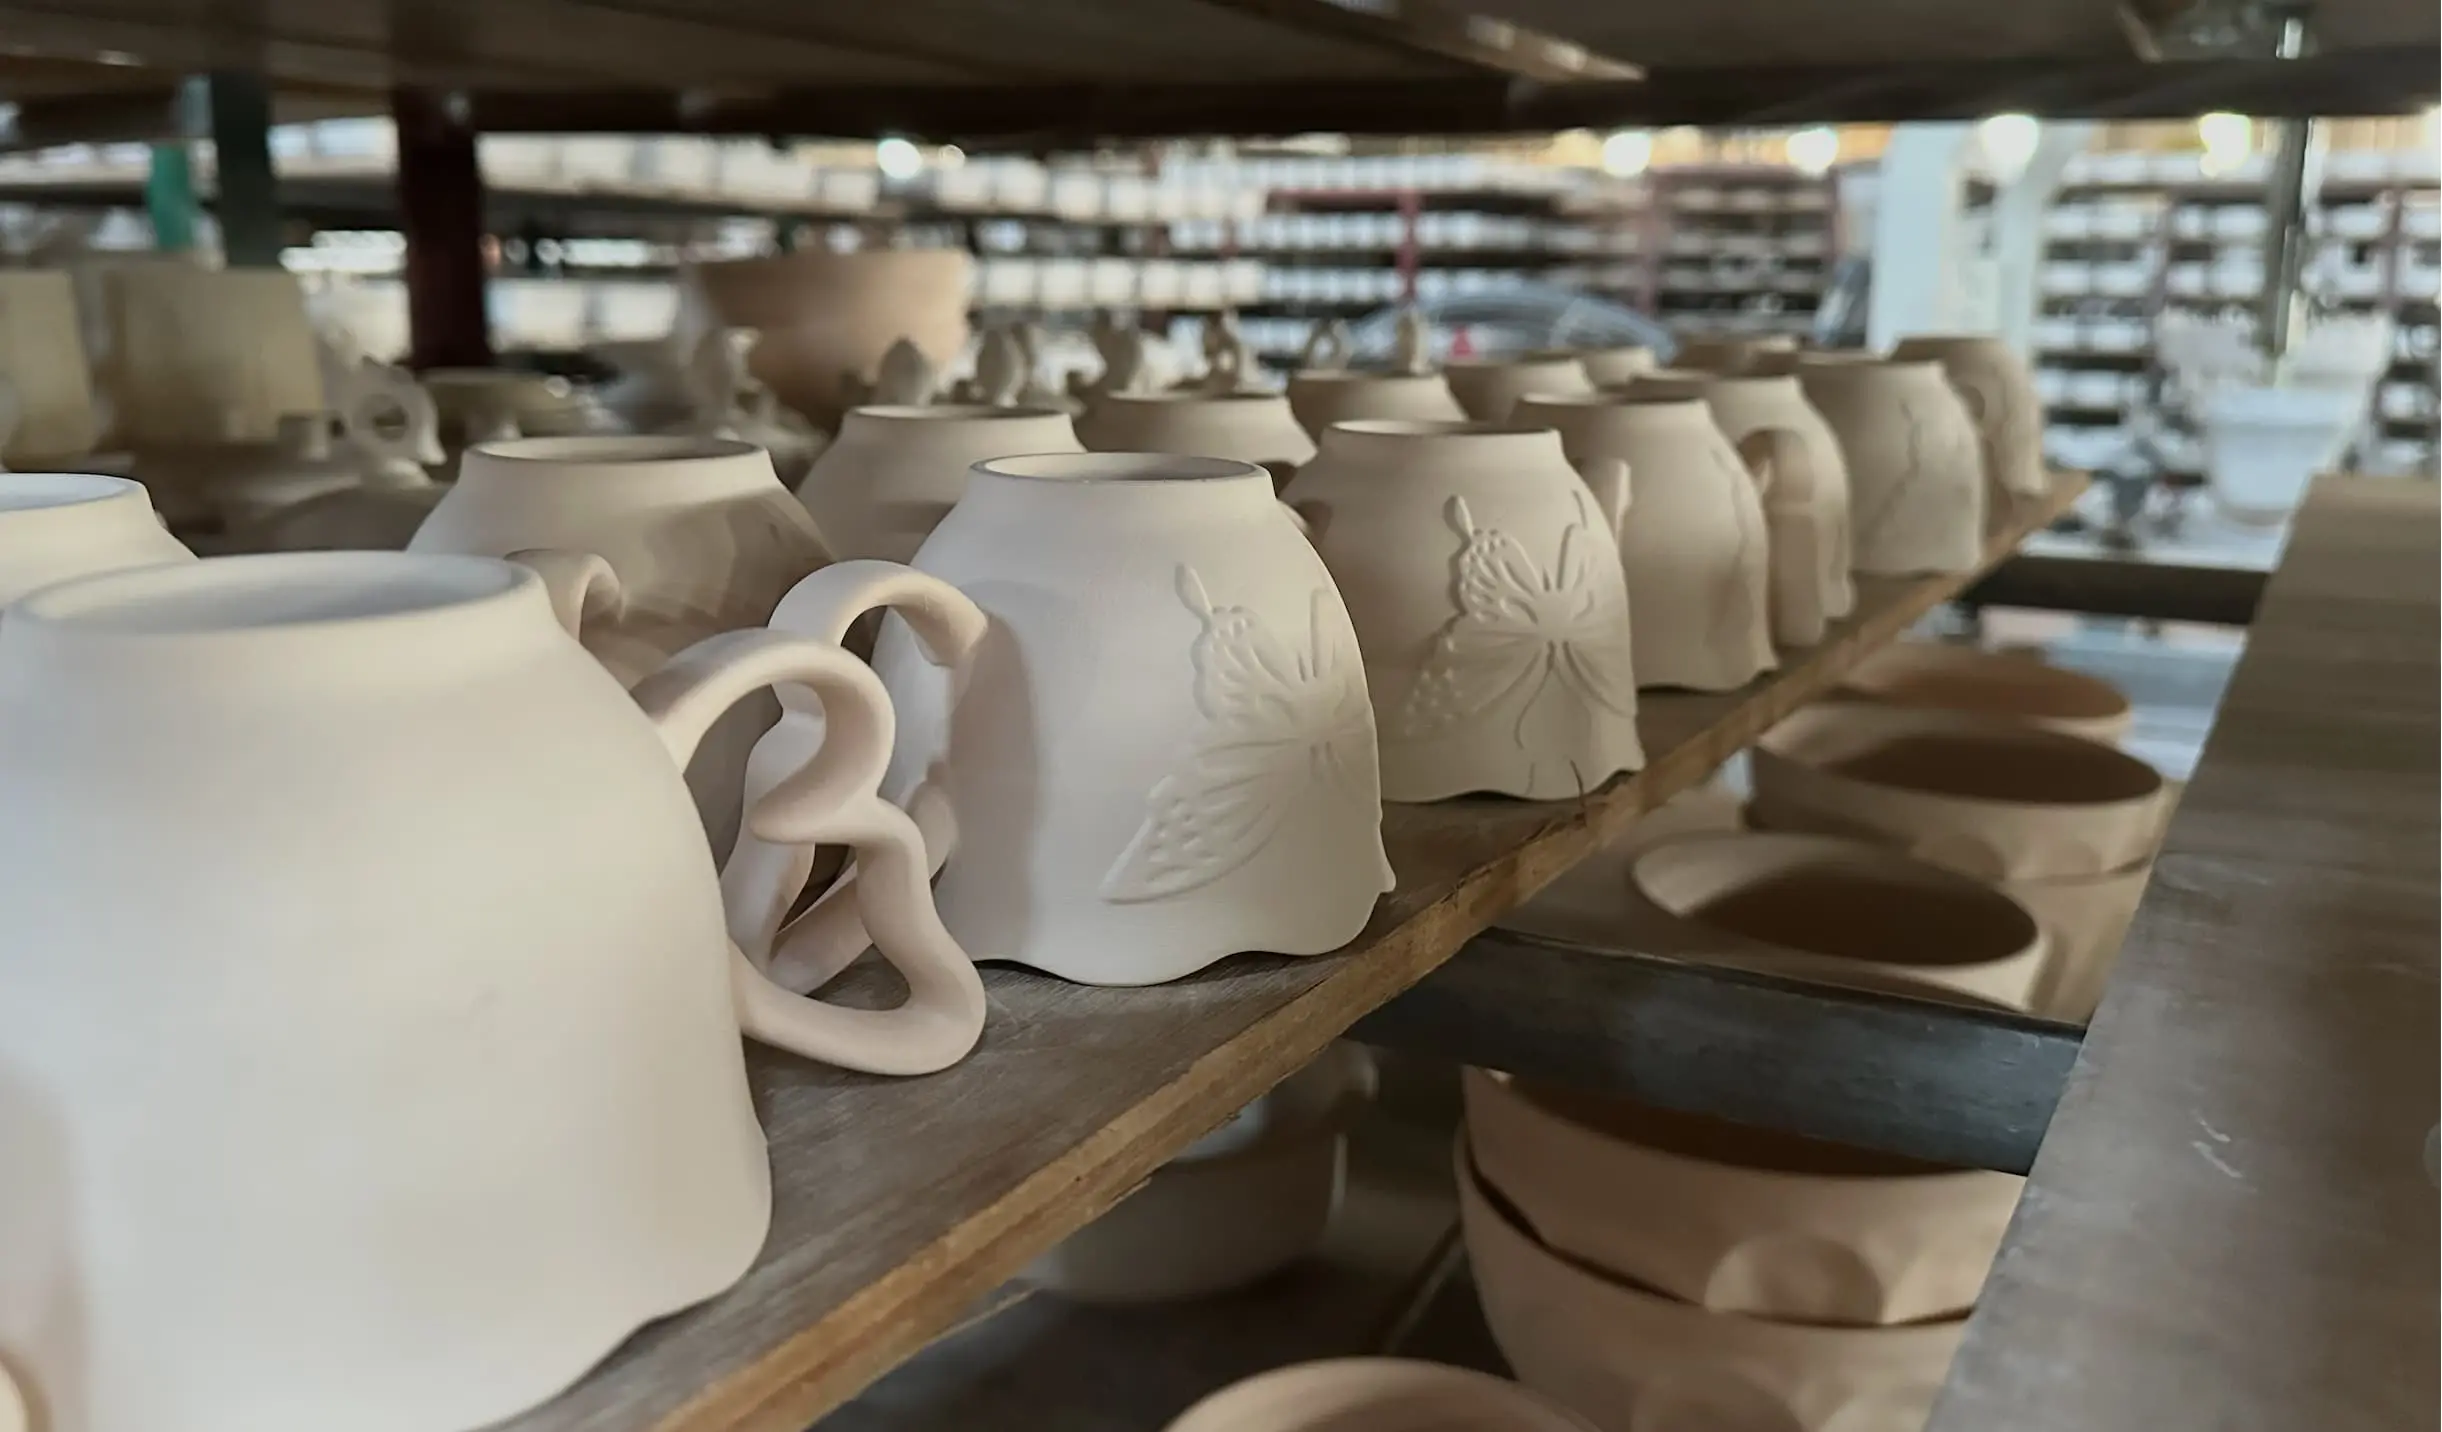
The same FENN process guide shows unglazed butterfly cups arranged on production shelves. I use that image to explain why one attractive sample is not a range approval. Ask for several fired examples of your own mark and inspect the same feature on each: the narrowest opening, deepest recess, or smallest letter.
These shelf photographs are process references, not proof that your new logo will pass inspection. Keep a best-looking sample and agreed boundary samples together. For the placement measurements, use our separate logo placement guide. This article helps choose the decoration route; that guide helps define where it goes.
My Advice as a Manufacturer
Decide whether the logo should be crisp, tactile, permanent, subtle, or easy to change. Then compare the two strongest routes on the actual body and glaze.
Keep the artwork simple and review several fired pieces. Connect the logo file to the product code, position, firing method, tolerance, compliance scope, and retained sample.
FENN’s private label ceramic tableware program covers branding and decoration, shape and finish development, and sampling. Use that discussion to agree a feasible route for your actual artwork before setting the production specification.
Questions Buyers Often Ask
Is a decal logo durable on ceramic dinnerware?
It can be. Durability depends on the decal, firing, surface, placement, washing, and care claim. Ask for fired samples and a real-use test plan.
Is an embossed logo more expensive than a decal?
Embossing often needs tooling, so its starting cost can be higher. Compare tooling, unit process, reject risk, and future artwork changes.
Which logo method is best for a small order?
An existing mold with a simple fired decal is often the first route to explore. Check print minimums and application cost.
How large should a ceramic logo be?
There is no universal size. It must suit the flat area, viewing distance, detail, shrinkage, glaze, and brand style. Sample two sizes near the process limit.
Conclusion
The best ceramic dinnerware logo is not simply the prettiest artwork. It is the mark that fits the brand job, ceramic process, order plan, market, and repeat-production controls. Compare decal vs embossed logo routes, stamps, and glaze marks on fired pieces, then approve the method and placement as one complete specification.
Choose a Logo Method With FENN
Contact FENN with your vector logo, product reference, intended position, order quantity, sales market, and washing or microwave claims. We can review the decoration options and agree what the fired samples need to show before bulk production.